


How to Install WordPress in your cPanel – Complete WordPress Installation Tutorial
To install WordPress on your cPanel Hosting using Softaculous, you need to do the following:
1). Login into your cPanel.
If you don't know how to log in to your cPanel click the link below for full guide before proceeding to STEP 2
2). In your cPanel scroll down to "Softaculous App Installer" section and click on "Softaculous App Installer" icon.

3). You will now see all the apps that you can install in 1 Click using Softaculous. Click on "Wordpress" icon in the Softaculous apps.
4). Click on "Install Now" button in the navigation bar.

5). Enter the following details under "Software Setup":
Choose Protocol: Select "https://www." from the drop down. This will install WordPress on "www.yourdomain.com". In case you have not installed SSL on your domain then select "http://www." option.

Note: If you are installing WordPress in your hosting account with us then you can select https protocol as Free SSL is already installed on your hosting account.
Choose Domain: Select your domain on which you want to install WordPress. In case you have multiple domains on the same hosting account.

In Directory: Delete by default written "wp" directory to install wordpress on your root directory. Not deleting it will install WordPress on "www.yourdomain.com/wp". So you must leave this field blank.

6). Enter the following details under "Site Settings" section:
Site Name: Enter the name of your blog/website. For example: "ABC Publications".
Site Description: Enter basic description of your Website. Example: "My Cool Blog".
Enable Multisite (WPMU): Don't check the checkbox. Leave this field as it is. Checking this option will enable WordPress Multi on your domain (Not Recommended).

7). Enter the following details under "Admin Account" section:
Admin Username: Set your user name for wordpress login. This will be your username for your wordpress admin panel.
Admin Password: Set your desired password for wordpress admin.
Note: We recommend you to use password generator to set password. Because it generate safe passwords which cannot be guessed by anyone.
Admin Email: Enter your email that you want to use with your admin.
You can use your gmail/yahoo or any other email as your admin email or you can also create emails from cPanel on your domain and use your Custom Domain email like you@yourdomain.com as your admin email.

8) Review the Following options:
Select Language: By default English is selected. So you don't need to change the language.

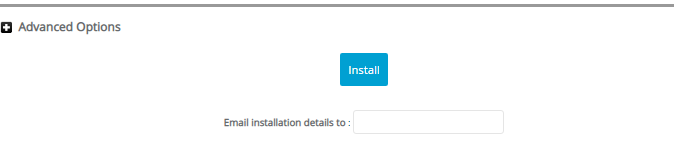
Advanced Options: Please do not make any changes in this section.
Select Theme: You can leave it for now. It is optional if not selected the default theme will be installed and you can make changes later on from your wordpress library.
Email Installation details: Enter your Email in this box at which you want to receive your WordPress details after installation.
9).Select Plugin(s)
Limit Login Attempts (Loginizer): Please don't check this. It is not recommended, so leave this as it is.

10). Click on "Install" button and wait for the installation process to get complete.
WordPress has now been successfully installed on your website. You will also receive a confirmation email on your email that you have entered during installation.
You can now access your wordpress admin panel from www.yourdomain.com/wp-admin using the login details entered during signup.
